Published
- 4 min read
Getting Started with the Steam Deck

About a year ago, Valve released a new device called the Steam Deck. They pitched it as a mobile gaming device that lets you play Steam games anytime, anywhere. But guess what? It’s way more than that! It is a touch screen computer with gaming controls running Arch Linux, and if you’re up for it, it can be used as a desktop computer as well.
Now, I know what you’re thinking - Linux gaming? That is an odd choice, there are no games for Linux. Valve thought about that as well and created Proton, a compatibility layer that allows you to run many Windows games on Linux. ProtonDB tracks all the games compatible with Linux. And many games that are listed as ‘not compatible’ also work, just nobody got around to test it.
Beyond that what valve officially offers, you can install any software that is compatible with Arch Linux, thus within a very short timeframe a large community has started to develop software that takes full advantage of the steam decks form factor and allows you to extend the Steam Deck to enable you to play games from other game stores, or run emulators.
I will show you how to can set up your Steam Deck to be the ultimate gaming machine.
Note: During the current Summer Sale you can get the Steam Deck with a 20% Discount
Table of Contents
- Table of Contents
- Basic Configuration
- Additional Game Launchers
- Console Emulation (EmuDeck)
- Windows 11
- Conclusion
Basic Configuration
Before we start, let’s do some basic configuration.
Disable Night Mode
By default, the night mode is enabled. I think that is quite annoying, so let’s disable it.
- Go to Settings (Press the Steam Button)
- Display > Disable Schedule Night Mode
Default Password
By default, there are two users set up root and deck. Both have no password set. This is a security risk, so let’s set one up.
To set a password:
- Open the App Konsole
- Enter the command
passwdto set a password for thedeckuser - (For the Root user) Switch users with
sudo su - Use the command
passwdto set a password for therootuser
Additional Game Launchers
You most likely will not have all your games on Steam. Lets set up some additional game launchers.
Heroic Games Launcher (Epic / GOG)
The Heroic Games Launcher is a native Linux GUI for the Epic Games Store and GOG Galaxy 2.0. It is just as easy to use as Steam.
For more information visit https://www.heroicgameslauncher.com/
Installation
There is a Flatpack Version that you install by going to https://flathub.org/apps/com.heroicgameslauncher.hgl and click install.
Configuration
Now it is only a matter of logging in and you are ready to go.
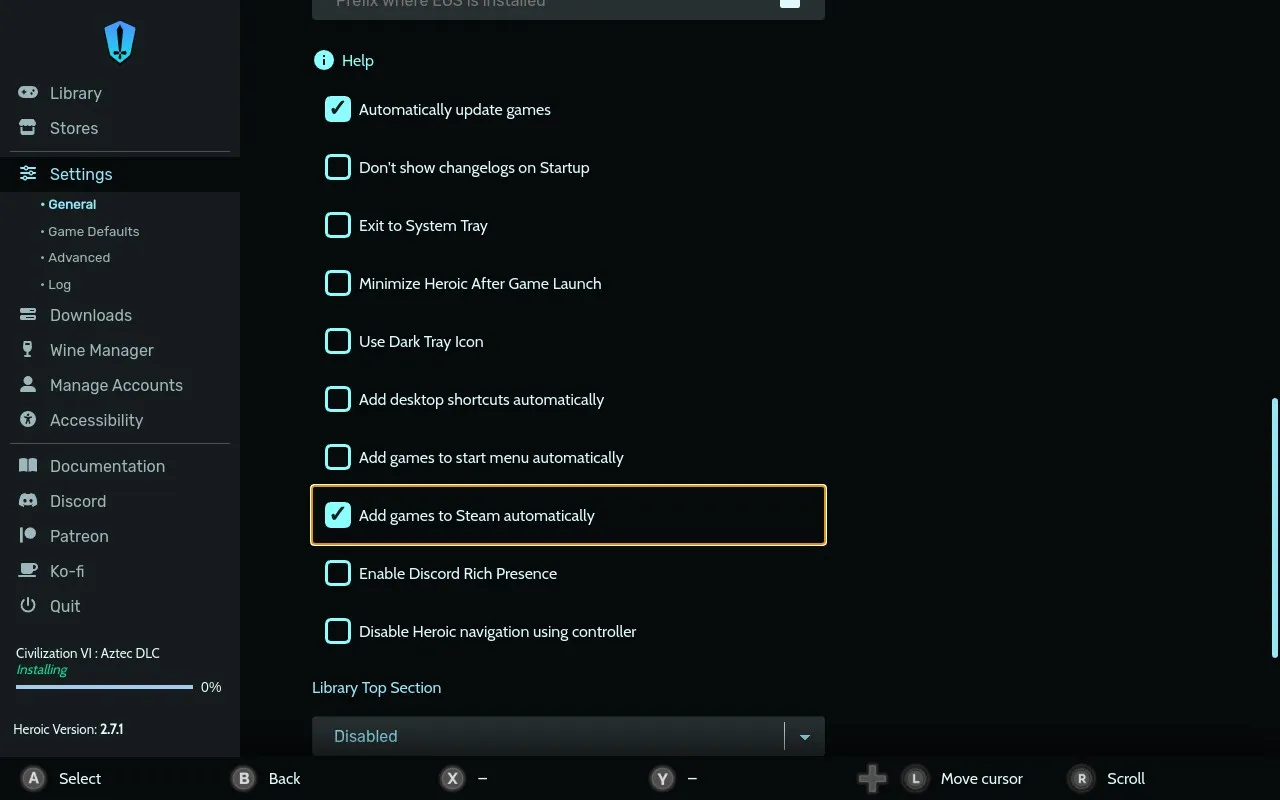
Additionally you can enable the option ‘Add games to Steam Library automatically’ in the General settings. This then enables you to launch the games directly from Steam, in the section “Non-Steam Games”.
Battle.net (Blizzard)
The Battle.net Launcher is the official launcher for Blizzard games.
Installation
- Switch to Desktop Mode
- Download the Battle.net Launcher
- Launch the Steam App
- Go to Games > Add a Non-Steam Game to My Library
- Select the downloaded Battle.net Launcher
- Do not launch the program yet. Instead, click on Manage > Properties…
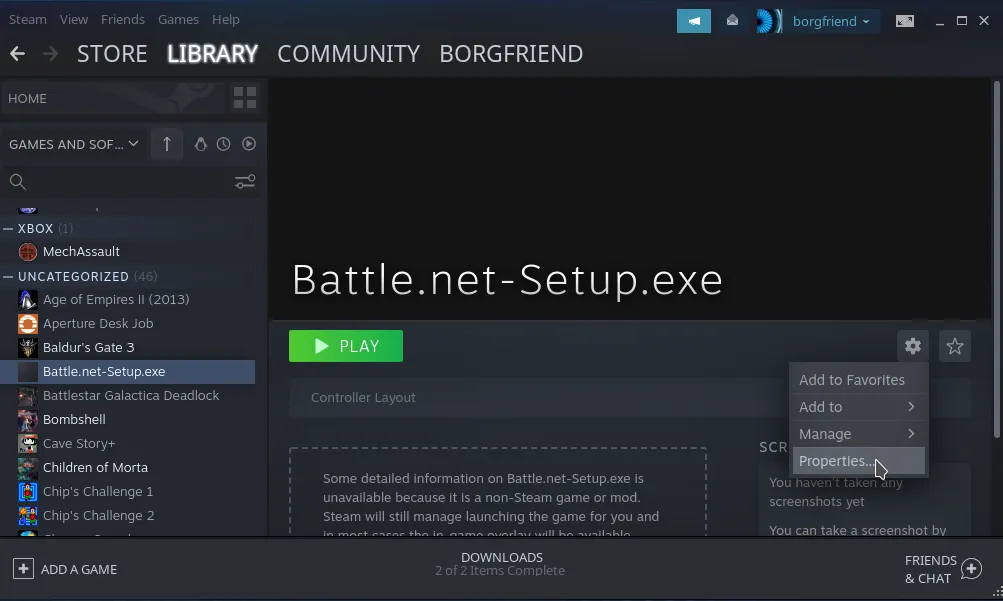
- Switch to the Tab “Compatibility” and select “Proton Experimental” as the compatibility tool

- Click on Close
- Launch the Battle.net Launcher from Steam
Configuration
After the Login there is nothing more to set up. You can now install and play your Blizzard Games.
Console Emulation (EmuDeck)
Emu Deck is a system that can install and configure multiple emulators.
Installation
- Switch to the Desktop Mode
- Download it here
- During the installation select the emulators you need, you can rerun the installer later to update and install additional emulators
- Then copy your ROM files into the corresponding rom folder.
Configuration
- Switch to the Desktop Mode
- Run the program “Steam Rom Manager”
- click on preview, if there is an error try renaming the rom file, or extracting it from the .zip file.
- Then when the roms look correct - click on “save to steam”
- Switch back to Gaming Mode
- You can launch the games via the tab “Non-Steams”
Windows 11
Unfortunatly some games will just not run on Linux. In many cases this is due to agressive DRM-Protections or Anti-Cheat software that detect that you are not running a normal windows system and then disable the game.
I personally do not have any games I currently want to play that do not run on the steam deck - so I did not yet try it out but here is a guide that would help you to install it: How to install Windows on your Steam Deck (xda-developers.com)
Conclusion
The Steam deck is probably the easiest way to get started with PC gaming - basically everything works out of the box, no hassle with drivers and immediate access to all of your steam games. It would be incredible if new releases would just support the steam deck out of the box.